The Opkey QLM Test Run section contains a summary of the total number of test case executions and their status. You can execute single or multiple test cases in this section. You can create and manage both automated and manual test runs in QLM.
For example, as a software tester evaluating a new mobile app, you can run an automated test to verify if the app launch is smooth or manually simulate user interactions such as button clicks and log the results in QLM. I
Let's understand the process of creation and execution of automated test runs in the following steps:
1. Navigate to the QLM section and select Test Run as shown below.

2. Click the Create Test Run button at the top to create test runs for manual or automated test cases. 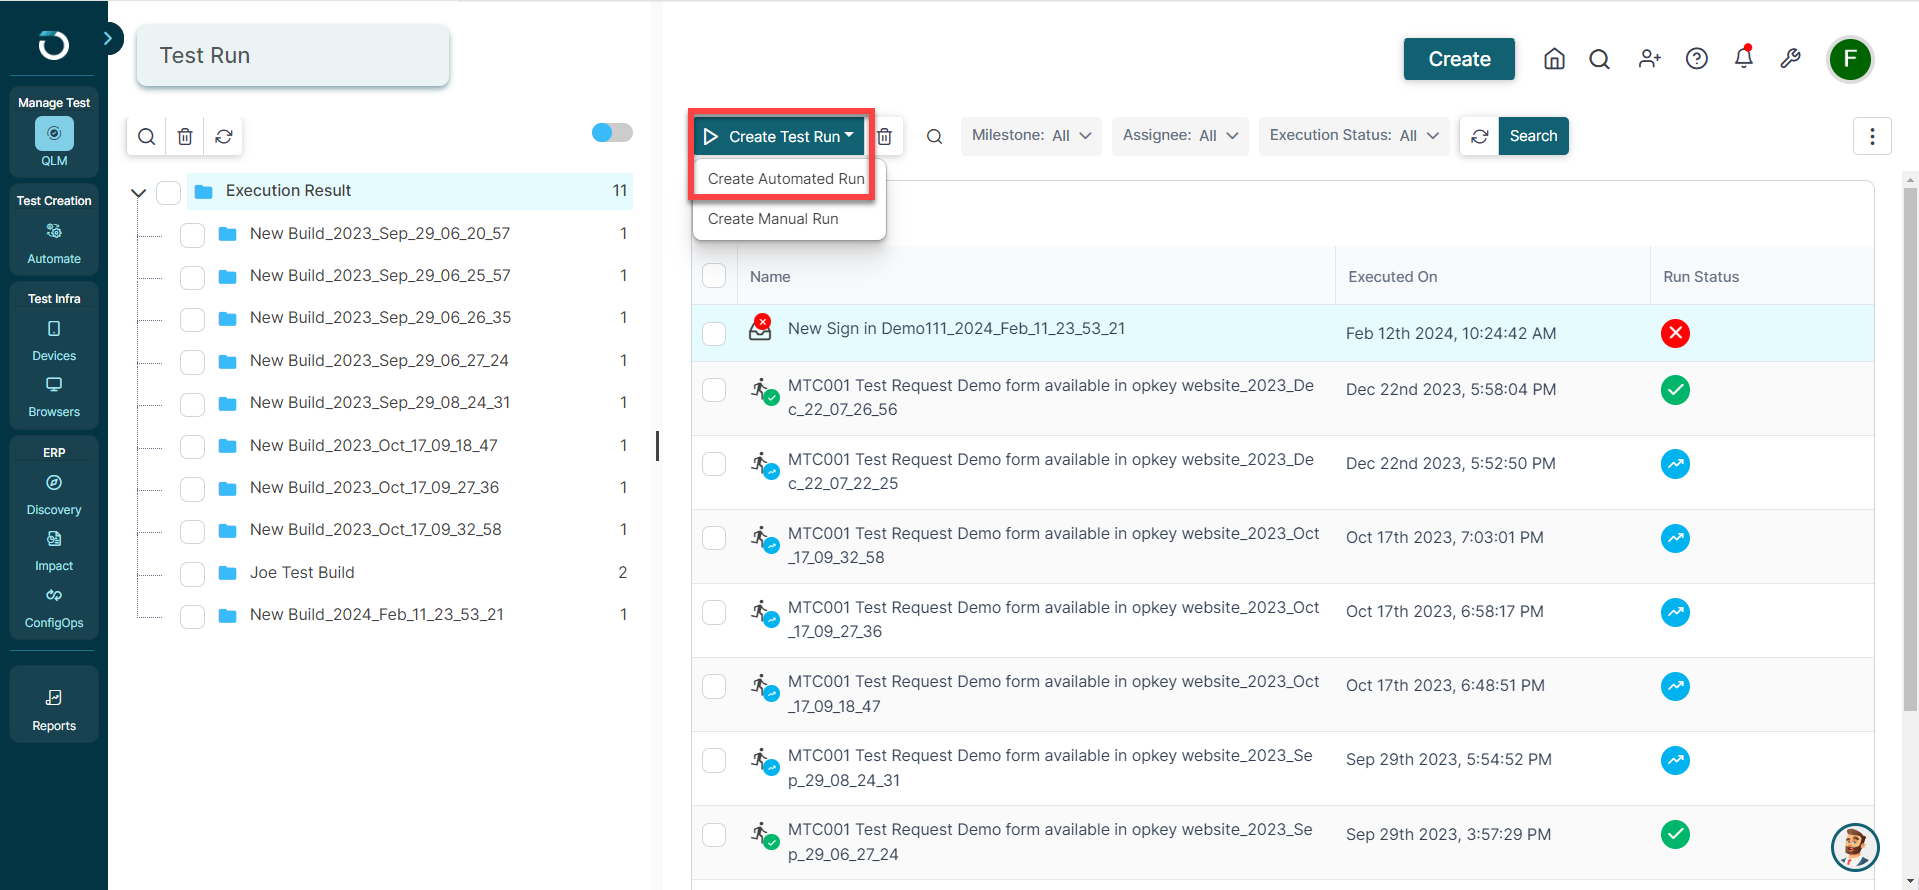
3. In this article, we will create an automated test run. On selecting the Create Automated Run, a panel appears on the right. Enter a name for your run, select the milestone for which you want to create this run, choose between test case and test suite, and select the tests/suites to run from the list given below.
4. Next, expand the Advanced Settings tab to select other necessary details such as build, execution agent, browser, etc. You can also select plugins, global variables, or tags and click Start Run to execute.
Note: If you are a Mac device user, select Agent Spock to execute the test. Use Opkey Execution Agent to execute test cases on a Windows device.

5. Once the execution begins, you can view the live test run logs. A View Result button appears after the completion of the execution. Click on it to view execution result details.

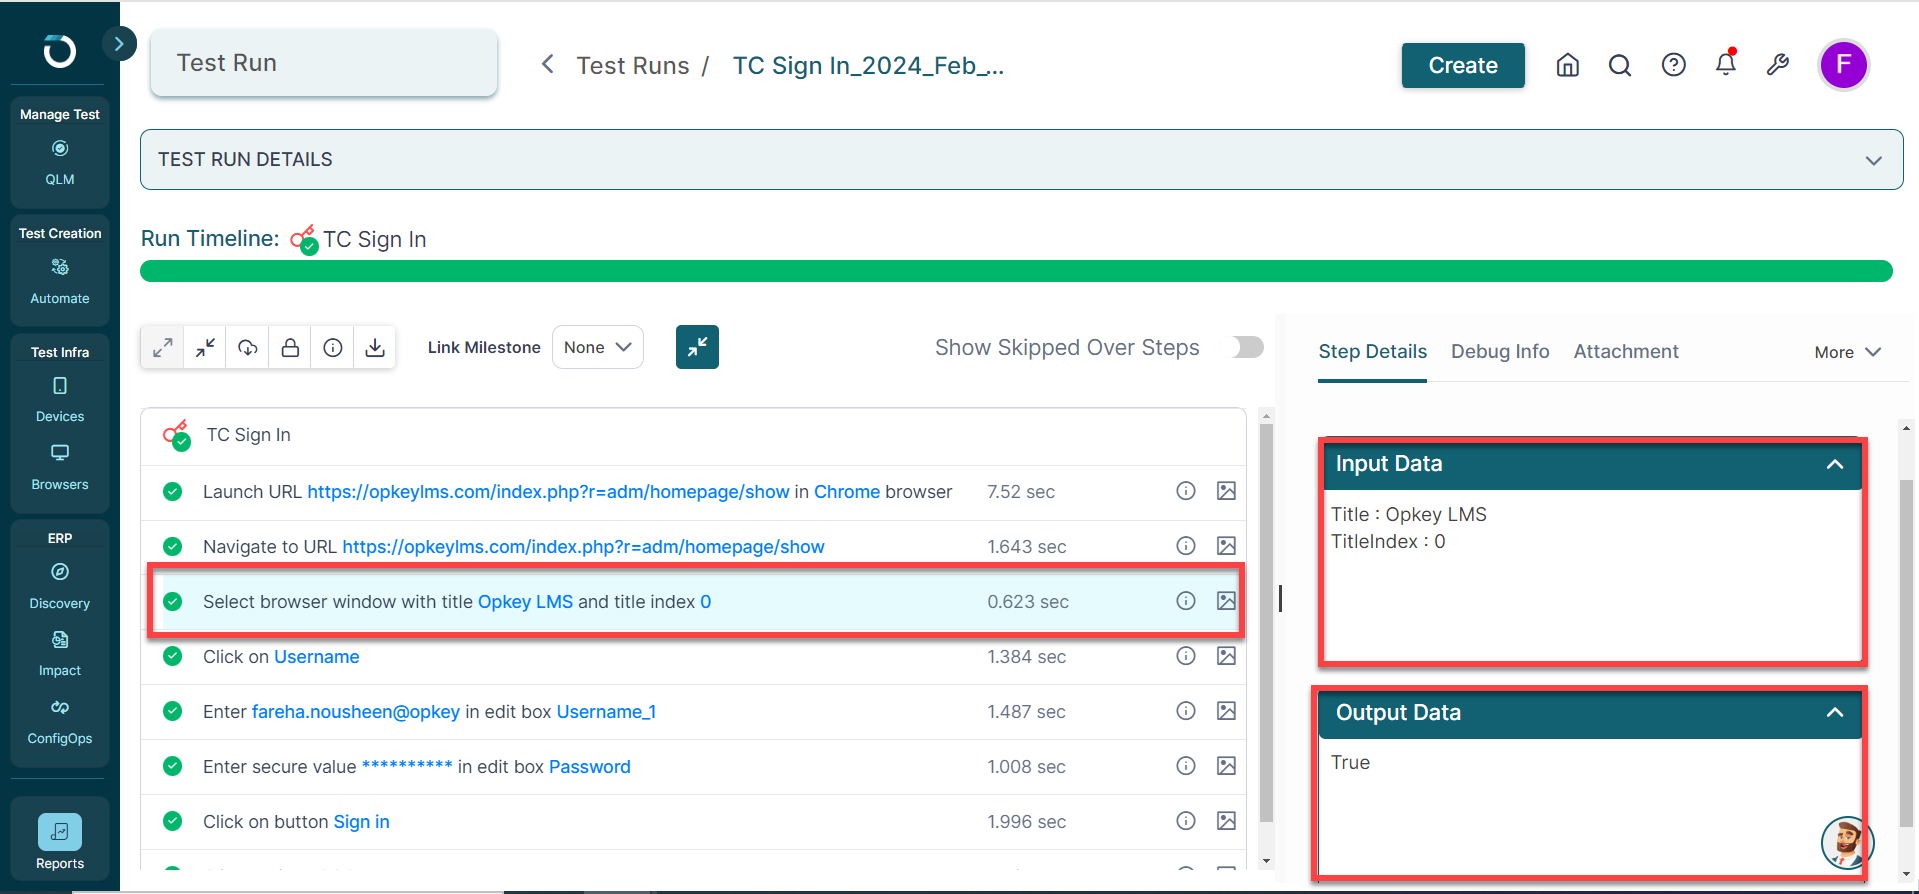
6. You can view the results of test run execution as shown below. Moreover, on the test result page, you can,
- Observe the status in the top ribbon along with the start and end times.
- Below the ribbon, you can review each test step status along with their execution times.
- In the toolbar above the test step section, you will find icons for expanding or collapsing the step view, downloading execution logs, or decrypting results.
- On the right side, you can access the summary section, which provides step information displaying the execution status and step description.

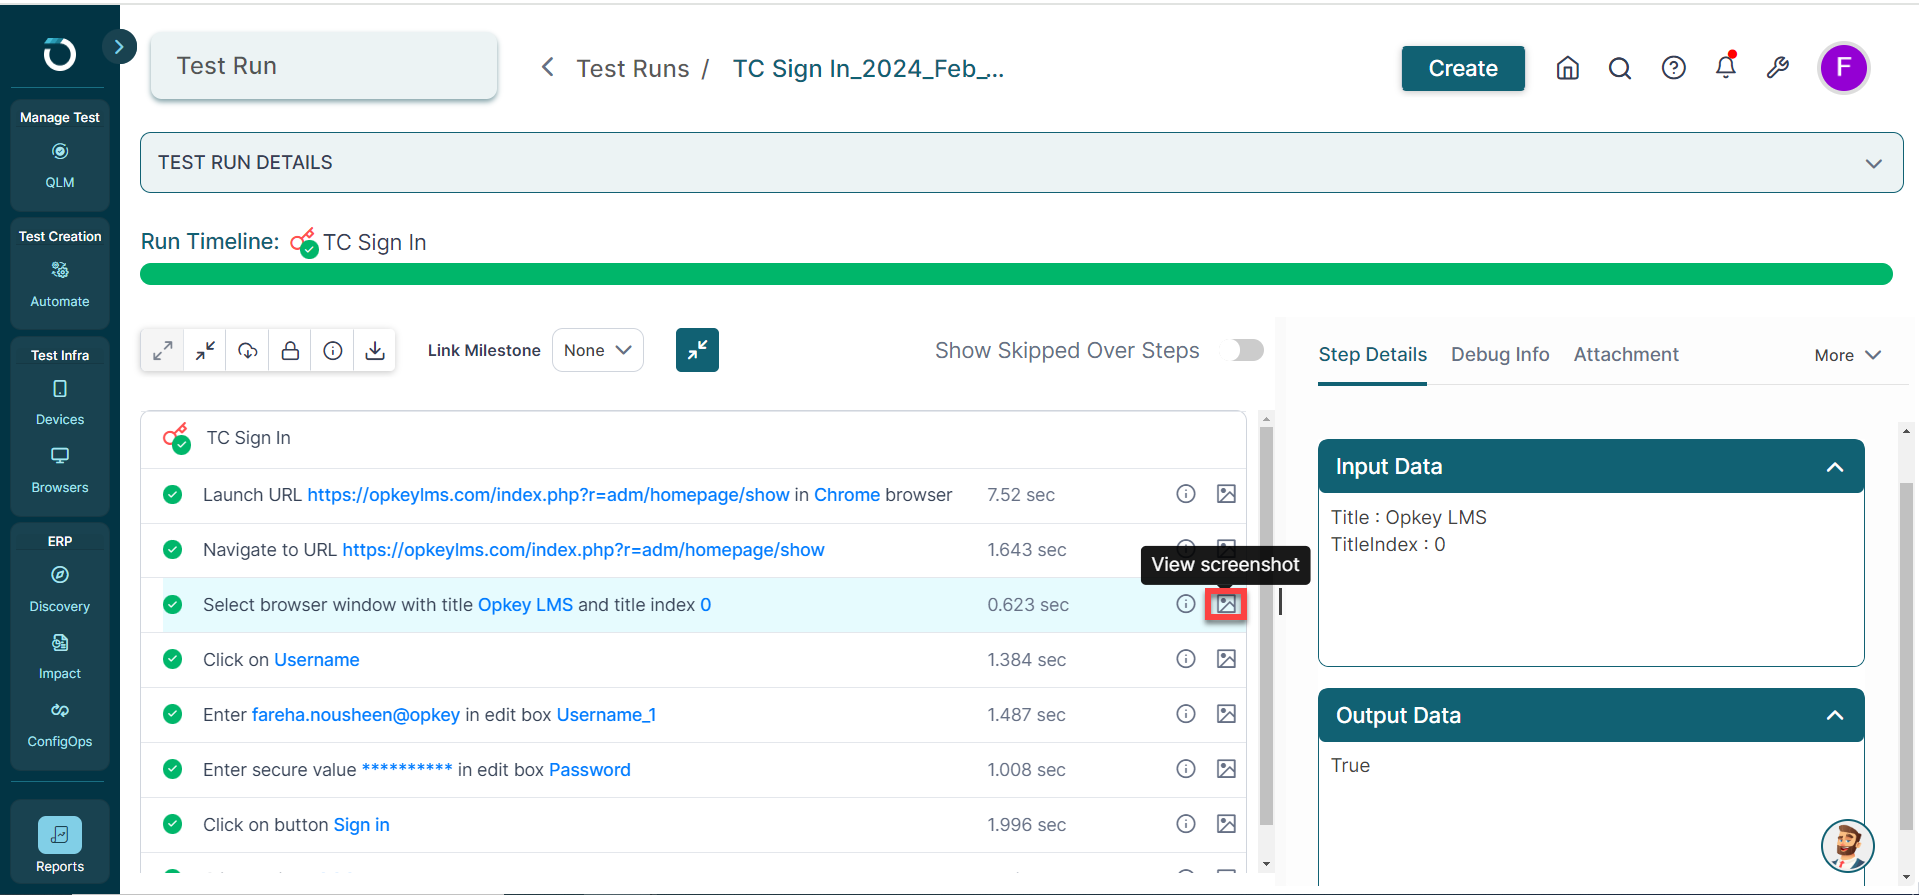
7. You can also expand a step and select it to view the screenshot of step execution in the Screenshot window on the right.
8. Below the Screenshot window, you can see the status of the input and output data of a selected test step.
You've reached the end of this article and are now well-prepared to execute test runs on QLM.
Ready to dive deeper? Check out the next article: Creation and Execution of Manual Test Case.
Explore, experiment, and achieve your testing goals on Opkey!
Was this article helpful?
That’s Great!
Thank you for your feedback
Sorry! We couldn't be helpful
Thank you for your feedback
Feedback sent
We appreciate your effort and will try to fix the article