Overview:
Opkey Oracle Fusion Recorder is a Recorder utility which enables you to record actions performed on an Oracle Fusion application, create Test Script & execute it. You can easily create a Test Case or Function Library in Opkey by recording the performed actions and play it back using Oracle Fusion plugin through test execution. The created Test Case or Function Library can be further customized as per the test scenario requirement.
Need of Oracle Fusion Recorder:
Oracle Fusion is a complex web application & it contains a multifaceted structure of tables embedded in the application. Automating Oracle Fusion application is a very difficult task. Now, Opkey is empowered with an advanced Oracle Fusion Recorder which helps you to record all actions with unique object properties performed in Oracle Fusion application & create a Test Case along with an object Repository. Once, test case has been created in this way, you can execute it by using the Oracle Fusion plugin.
It comes with the Opkey Smart Recorder package. For installing Opkey Fusion Recorder, please refer to Installing Opkey Smart Recorder. Once, it has been installed on your machine, its icon is showing on the desktop as shown below:

Opkey Smart Recorder is a complete recorder package which works as a Web, Mobile, Desktop, Salesforce, Workday, Oracle as well as Oracle Fusion Recorder. You need to choose the platform (Web, Mobile, Desktop, Oracle, Oracle Fusion, Salesforce & Workday) on which you want to perform recording.
If you are performing recording on Web, Mobile, Desktop or Oracle Fusion application for the first time, you need to install Opkey Smart Recorder. Once it is installed, you can perform recording on the supported platforms applications. You can also install the standalone Smart Recorder installer.
Getting started with Opkey Oracle Fusion Recorder:
To start recording on the Oracle Fusion Application by using Oracle Fusion Recorder, you need to follow the below given steps:


Test Execution using Oracle Fusion Plugin:
Once the Test Case of Oracle Fusion has been created successfully, you can execute it by using Oracle Fusion Plugin on Chrome. So, make sure that you have installed Oracle Fusion Plugin on your machine.
Navigate to the Data Input Argument tab of the OpenBrowser test step and type the Chrome as name of web browser in the Browser option as shown in the below image:

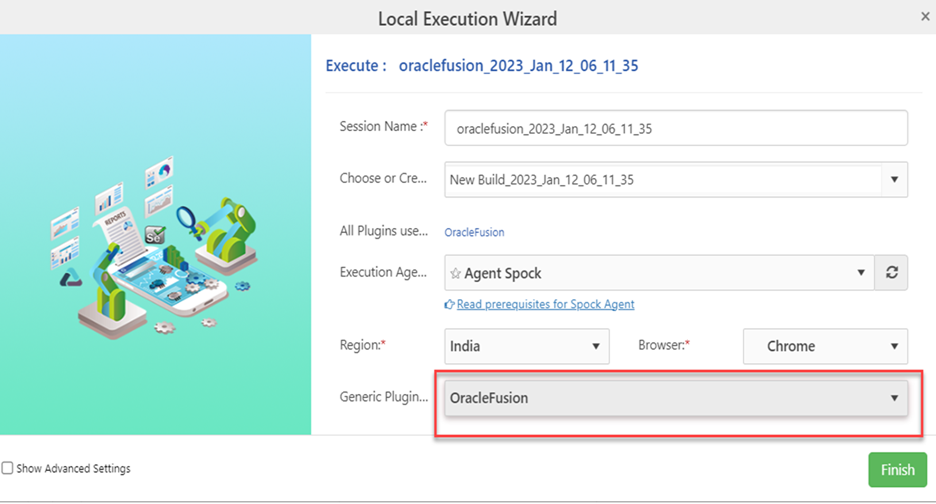
Click on Run Now (F5) button. Local Execution Wizard opens. Fill all required fields along with Opkey Oracle Fusion as plugin from the dropdown list in Generic Plugin.
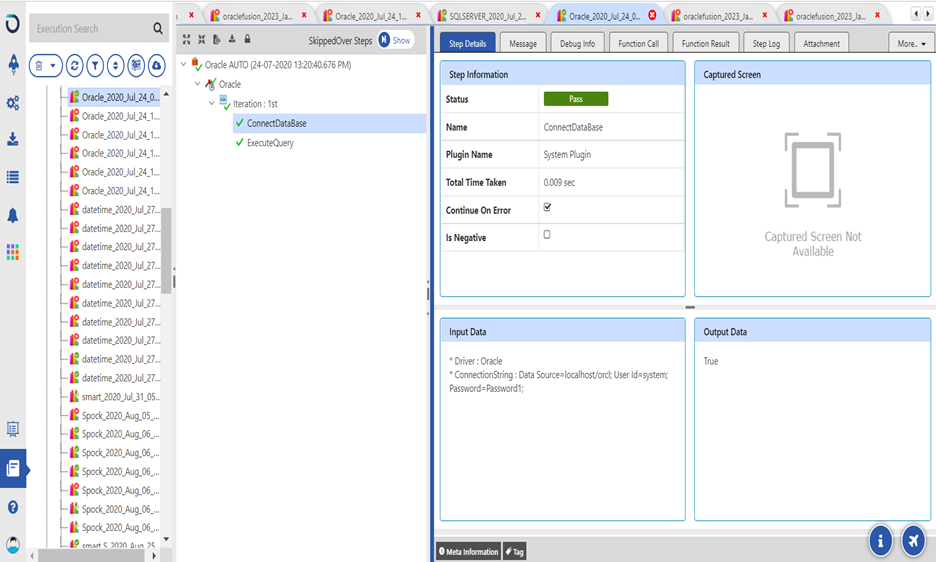
Once, execution process has completed, you can view the execution result.
Was this article helpful?
That’s Great!
Thank you for your feedback
Sorry! We couldn't be helpful
Thank you for your feedback
Feedback sent
We appreciate your effort and will try to fix the article